
How to Change Wattage on OXVA XLIM Devices
Changing wattage on an OXVA XLIM is usually simple, but choosing the right setting matters just as much as knowing which button to press. The right wattage affects flavour, warmth, throat hit, pod lifespan and how well your device matches your liquid.
This guide explains how to adjust wattage on the XLIM range, which pod resistances suit which output levels, and how the current XLIM lineup compares if you are deciding what to buy next.
Quick answer: on most adjustable OXVA XLIM devices, you enter output adjustment mode from the fire button or screen, then move the wattage up or down until the pod feels right. The best setting is usually the lowest wattage that still gives you satisfying flavour and nicotine delivery. Buttonless models such as the XLIM GO 2 are designed more as fill-and-go devices than manual wattage-tuning devices.
How to Adjust Wattage on OXVA XLIM Devices
Adjusting wattage changes how warm the vapour feels, how strong the throat hit is, how intense the flavour comes through, and how hard the pod is working. It also affects pod lifespan.
As a rule, lower wattage gives a cooler, smoother vape and usually helps pods last longer. Higher wattage gives a warmer, stronger vape, but can shorten pod life if you push it too far.
Turn the device on
Wake the device and make sure the screen responds properly before changing anything. On button-based models, confirm the device is powered on first.
Enter wattage mode
On most button-based XLIM devices, this means entering output adjustment mode from the fire button. On touchscreen models, use the on-screen controls instead.
Adjust in small steps
Move up or down gradually rather than jumping straight to the highest number. A small change can make a big difference to flavour and smoothness.
Test and keep the best setting
Once flavour, warmth and draw feel right, keep the device there instead of pushing it harder for no reason.
Best practice: the ideal wattage is not the highest one. It is the lowest setting that still gives you the flavour, throat hit and nicotine delivery you want.
Recommended Wattage Settings for XLIM Pods
These are practical starting ranges for the main XLIM cartridge resistances. They are useful as a starting point, but the final choice still depends on your liquid, nicotine strength and how warm you like the vape.
| Pod Type | Resistance | Suggested Wattage Range | Best For |
|---|---|---|---|
| XLIM Top Fill / EZ Cartridge | 0.4Ω | 26–30W | Warmer RDL with stronger vapour output |
| XLIM Top Fill / EZ Cartridge | 0.6Ω | 20–25W | RDL or looser MTL with stronger flavour |
| XLIM Top Fill / EZ Cartridge | 0.8Ω | 12–16W | Smooth all-day MTL, especially with nic salts |
| XLIM Top Fill / EZ Cartridge | 1.2Ω | 10–12W | Cooler MTL and efficient higher-nicotine use |
If flavour starts tasting harsh or burnt, the wattage may be too high for that pod, the liquid may be too sweet for how hard you are running it, or the pod may simply be wearing out.
For more detail, see the XLIM pod compatibility guide and the burnt taste guide.
Compare Current OXVA Devices
Not every OXVA device behaves the same way, and not every pod family fits every device. This is the cleanest way to understand the current range before you buy the wrong kit or the wrong pods.
| Device | Battery | Output | Pod Family | Best For |
|---|---|---|---|---|
| XLIM Pro 3 | 1500mAh | Up to 30W | XLIM + EZ | Users wanting a current flagship-style XLIM with manual control |
| XLIM 3 Ultra | 1500mAh | Up to 30W | XLIM + EZ | Users wanting a more premium touch-screen XLIM experience |
| XLIM SQ Pro 2 | 1600mAh | Up to 30W | XLIM series | Users wanting a compact square format with a touch screen |
| XLIM GO 2 | 1500mAh | Fill-and-go design | XLIM pod platform | Beginners who want simplicity over manual adjustment |
| NeXLIM | 1500mAh | Up to 40W | Dedicated NeXLIM pods | Users wanting a newer dual-mesh OXVA system outside the XLIM family |
| VPrime | 2600mAh | Up to 60W | Dedicated VPrime pods | Users wanting a more open, more powerful OXVA pod device |
Important: XLIM, NeXLIM and VPrime do not all use the same pod family. Always send readers to the correct pod guide instead of assuming one cartridge works across every OXVA device.
Pro Tip: Match Wattage to Pod and Liquid
Using nic salts? Most XLIM users get the smoothest result by pairing higher-resistance pods with moderate wattage instead of forcing the device hotter than it needs to be.
If you use nic salts and want a smoother inhale, stay with the pod resistance and wattage combination that gives you solid flavour without excessive heat. If you use lower nicotine and want stronger output, move toward lower-resistance pods and slightly higher wattage.
The most common mistake is turning wattage up too far, too early, then blaming the pod when flavour drops off quickly.
Best E-Liquids for XLIM Devices
For most XLIM pods, the safest everyday match is a pod-friendly balanced liquid. In practice, that usually means nic salts or 50/50-style e-liquids rather than very thick high-VG blends.
0.6Ω Pods
Good if you want a warmer, punchier vape with stronger flavour and a little more output.
0.8Ω Pods
The safest balanced option for many daily MTL users, especially with nic salts.
1.2Ω Pods
Cooler and smoother, ideal if you want a gentler draw and more efficient nicotine delivery.
Top Current OXVA Products to Pair With This Guide
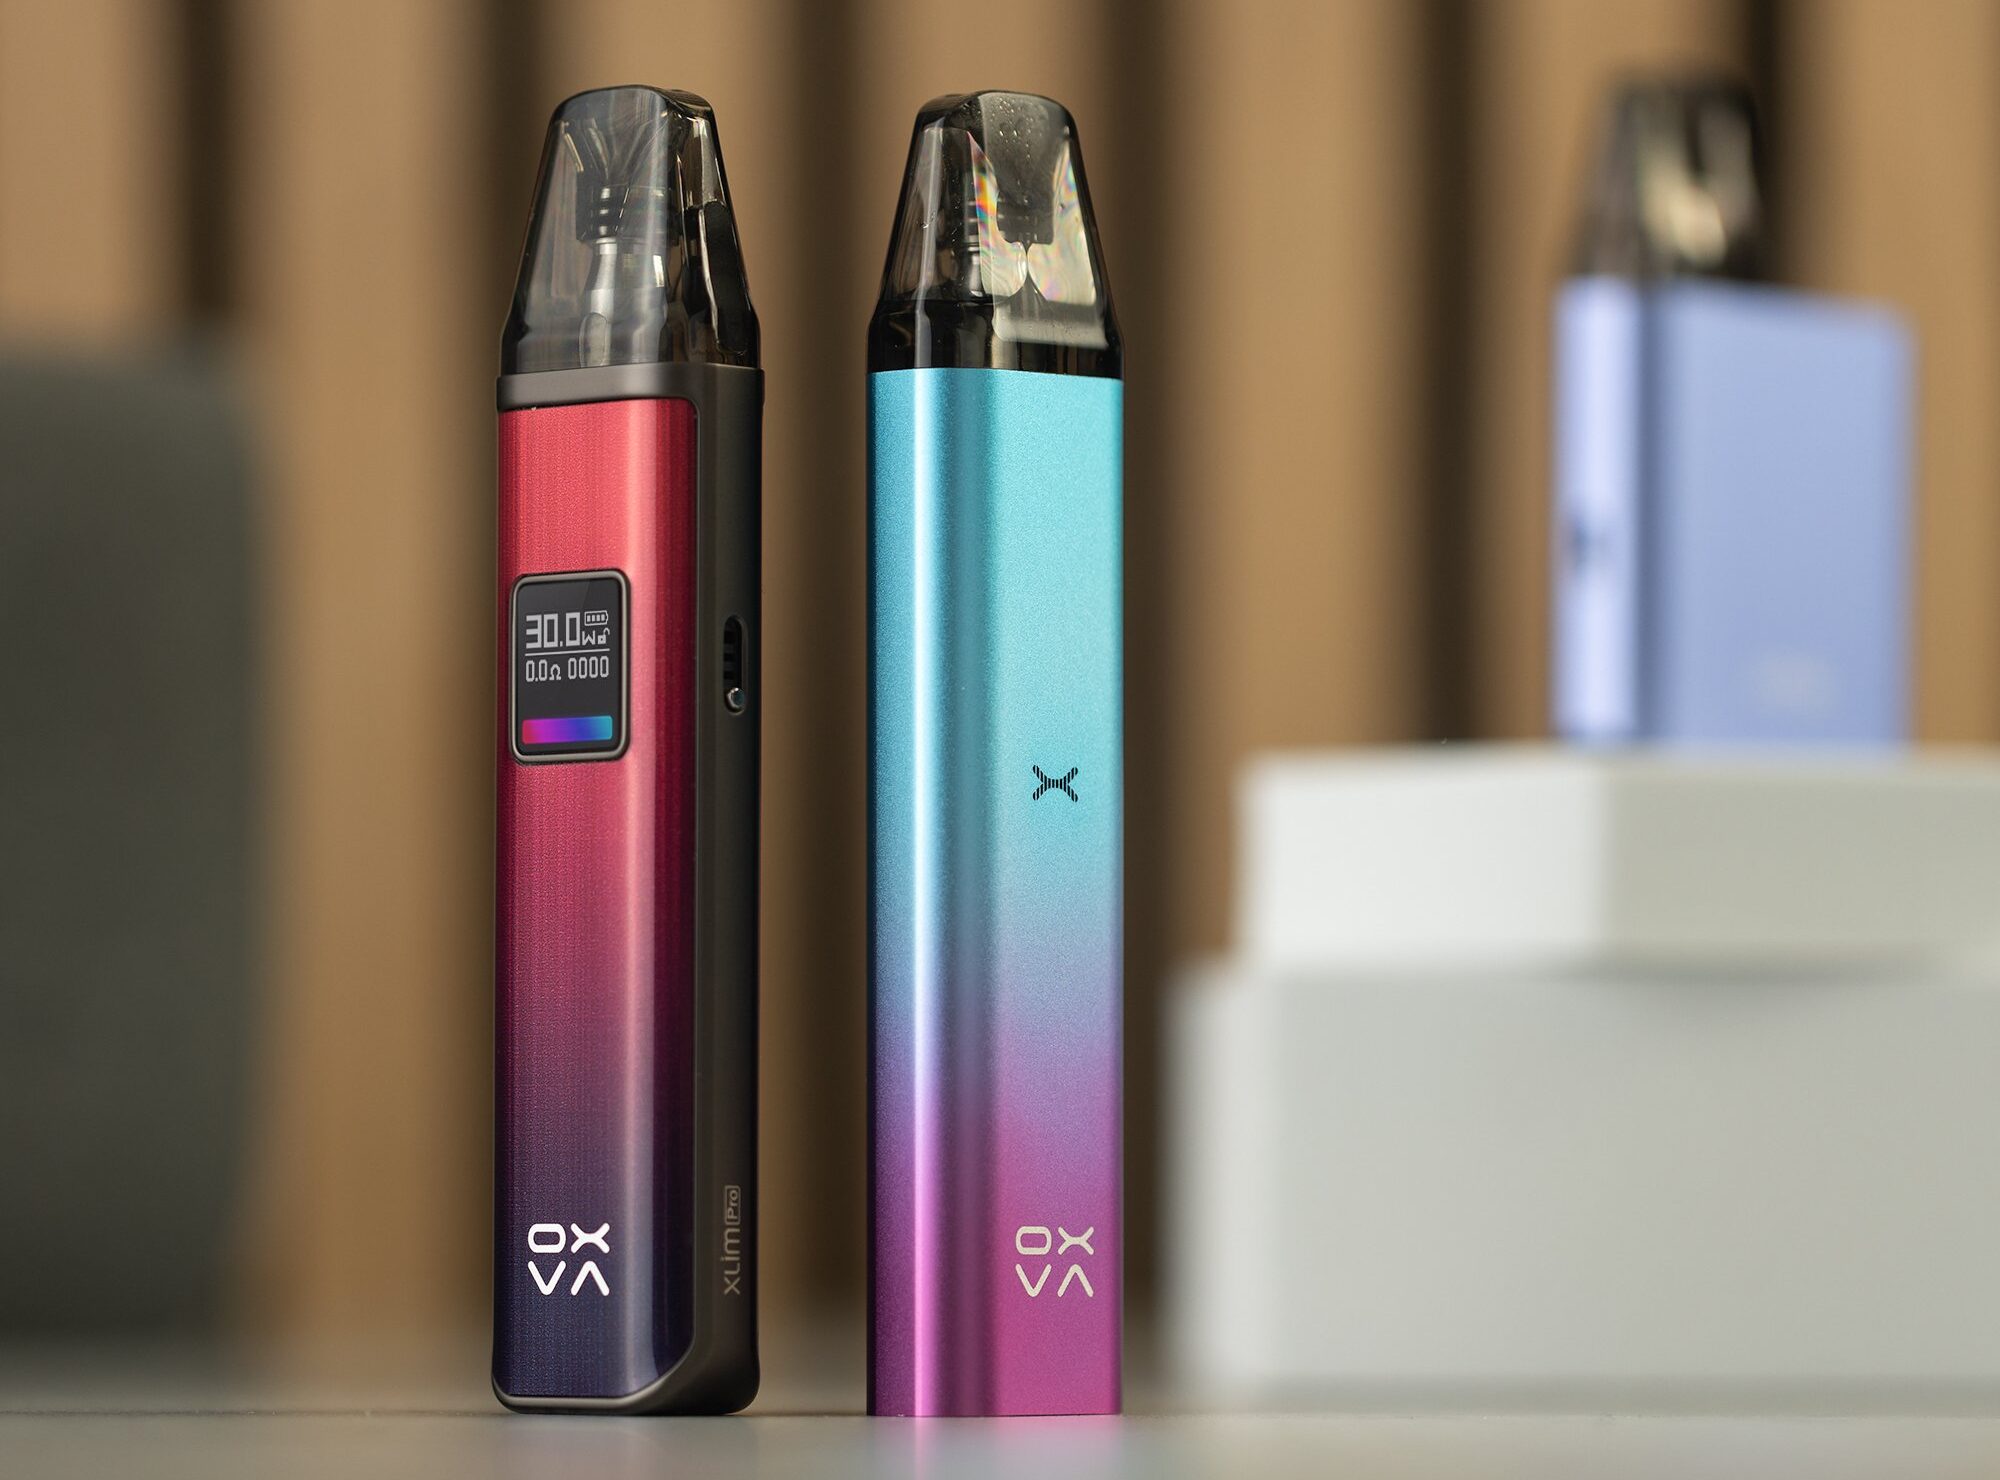
OXVA XLIM Pro 3
A strong fit for anyone specifically searching for wattage adjustment on a current OXVA XLIM device.
- 1500mAh battery
- Up to 30W output
- XLIM and EZ pod support
OXVA XLIM V3 Pods
The most useful next purchase for readers trying to match wattage and pod choice properly.
- 0.4Ω to 1.2Ω options
- Top-fill convenience
- MTL and RDL coverage
OXVA XLIM EZ Pods
A useful route for users who want XLIM-family flavour with a convenient easy top-fill cartridge format.
- Top-fill design
- Wide resistance choice
- Good all-day pod option
Compare NeXLIM & VPrime
If you are actually deciding between XLIM and OXVA’s newer non-XLIM systems, route to the right guide instead of the wrong pods.
- NeXLIM = dedicated dual-mesh pod system
- VPrime = more airflow and more power
- Different pod families from XLIM
FAQs
Can I use 50/50 liquids in XLIM devices?
Yes. For most XLIM pod setups, balanced pod-friendly liquids are the safest everyday choice and work especially well with the common higher-resistance pods.
Why does wattage sometimes feel wrong after changing the pod?
If flavour suddenly feels weak or harsh, the pod may not be seated correctly, the pod may be worn out, or the wattage may simply be mismatched to the resistance you installed.
Which pod is best for an all-round XLIM setup?
For many users, 0.8Ω is the safest balanced everyday option, while 0.6Ω works well if you want a slightly warmer and stronger vape.
Do all OXVA devices use the same pods?
No. XLIM, NeXLIM and VPrime use different pod families, so always check compatibility before buying replacements.
What is the best product path from this page?
For most users, the strongest next clicks are XLIM Pro 3 as the main device, then XLIM V3 or XLIM EZ pods as the support purchase.
Does higher wattage always mean better flavour?
No. Too much wattage can make flavour harsh, shorten pod life and increase the risk of burnt taste. The best flavour usually comes from the right balance, not the highest number.